← Home About Archive Also on Micro.blog
  • Blue Meanie - Test Prints

    Day 2 – Wed, Nov 13, 2019

    Heavy duty

    Most of parts that I will have to 3D print will be used to connect the moving components: belts, bed, carriage, etc. These need to be strong, durable, and rigid. The recommended print settings call for 3+ shells and 90% infill. Some of these parts will weigh over 100mg when complete. That’s a sizable chunk of plastic and not exactly cheap either. Even with bargain basement plastic, that’s still somewhere in the neighborhood of $2 for those large parts. With that in mind I’ve been doing a lot of draft quality prints to ensure that my settings are correct.
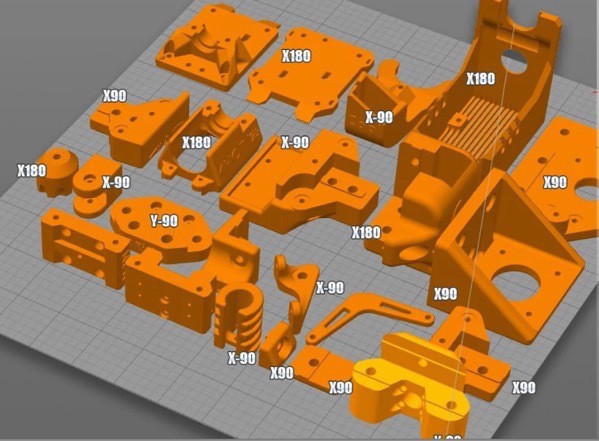
    3D Pinted Parts

    Testing testing

    I’ve been doing a lot of testing to try to find a happy temperature that provides great layer adhesion, allows supports to tear away without too much extra work, doesn’t string or blob too much, and retracts without clogging. And a dozen other lesser criteria too.

    I initially ran into a lot of problems with supports. Layer adhesion and tear-away supports almost diametrically opposed constraints. Great layer cooling fans really make the difference here. I adjusted my layer cooling to aim a bit more accurately and now things are really looking perfect at 205º for my light blue PLA. I have the same filament in white and red too. The red seems to like it hotter and the white is really stringy – so I’ll try cooler when I get to those parts.

    There’s also a few oddball parts – like a few LED diffusers that need to be nearly transparent. I have some clear PLA, but it’s always been a real pain to print with. I’m not looking forward to those parts.

    → 9:00 PM, Dec 3
  • Blue Meanie - A Beginning

    Day 1 – Mon, Nov. 11, 2019

    Where to begin

    First, I need a new name for this big 3D printer project. No offense to Ben Levi the designer of this thing, but BLV MGN Cube just doesn’t roll off the tongue and I’m not a fan of acronyms.

    I bought some really nice light blue plastic recently. It’s cheap, prints a bit more matte than most PLA, and I think it’ll make a great base color for all the parts. Perhaps it was too many medications in my system, but thinking of blue filament got Blue Meanies stuck in my head – so that’s what I’m going with.

    Blue Meanies

    Pneumonia and 3D printing

    Even before parts arrive for the Blue Meanie there’s a lot of work to be done. This design requires printing a lot of little parts with your existing printer. There are at least 50 parts to get the basics working, another 25 or so for covers and grills and filters, and another 25 or so for trim, LEDs, buttons and other extraneous doodads.

    It’s a lot of printing, but that’s A-OK with me. I’m currently only able to stay awake a few hours at a time and even walking a few steps around my bedroom makes me lightheaded. (Note: this post is from my dev journal a few weeks ago – I’m feeling much better now. Yeah!) This makes printing the perfect recuperation task for me. I spend about 15-20 minutes setting up a print. Walk over to the printer and make sure the first layer is laying down nicely and boom, I’m done. Time for another nap. 😴

    → 8:40 PM, Dec 3
  • The Big Printer Project

    Retail Therapy

    I’m ashamed to admit that sometimes when I’m ill I buy things. I guess it’s a sort of “retail therapy.” I almost always regret it when the amazon boxes arrive. But it does make me feel a bit better.

    A few years ago, in a fever delusion I got a great deal on a 3D printer. Or, well, I thought it was. It was actually a box full of 3D printer parts and some photocopied instructions, most in Chinese. No wonder it was so much cheaper than the other printers.

    That sounds terrible, but it was actually super fun to build and turned into a really nice printer. I was in way over my head enjoyed it the whole time. Since then, whenever I’ve been really ill I’ve bought another kit to build.

    Pneumonia

    About a month ago my son came down with mononucleosis and pneumonia at the same time. Oof! He was hyper contagious and coughing all over everything so he was quarantined at home for a couple weeks. With me. Needless to say, I got sick too. Being 14 and in perfect physical condition my son bounced back from both illnesses effortlessly. I only got pneumonia, but I did not bounce back.

    I got really very sick. But after a few days in the hospital and some miraculous intravenous antibiotics I’m finally, slowly getting better.

    And it’s obviously time for a new 3D printer!!!

    BLV mgn Cube 3D printer

    BLV MGN

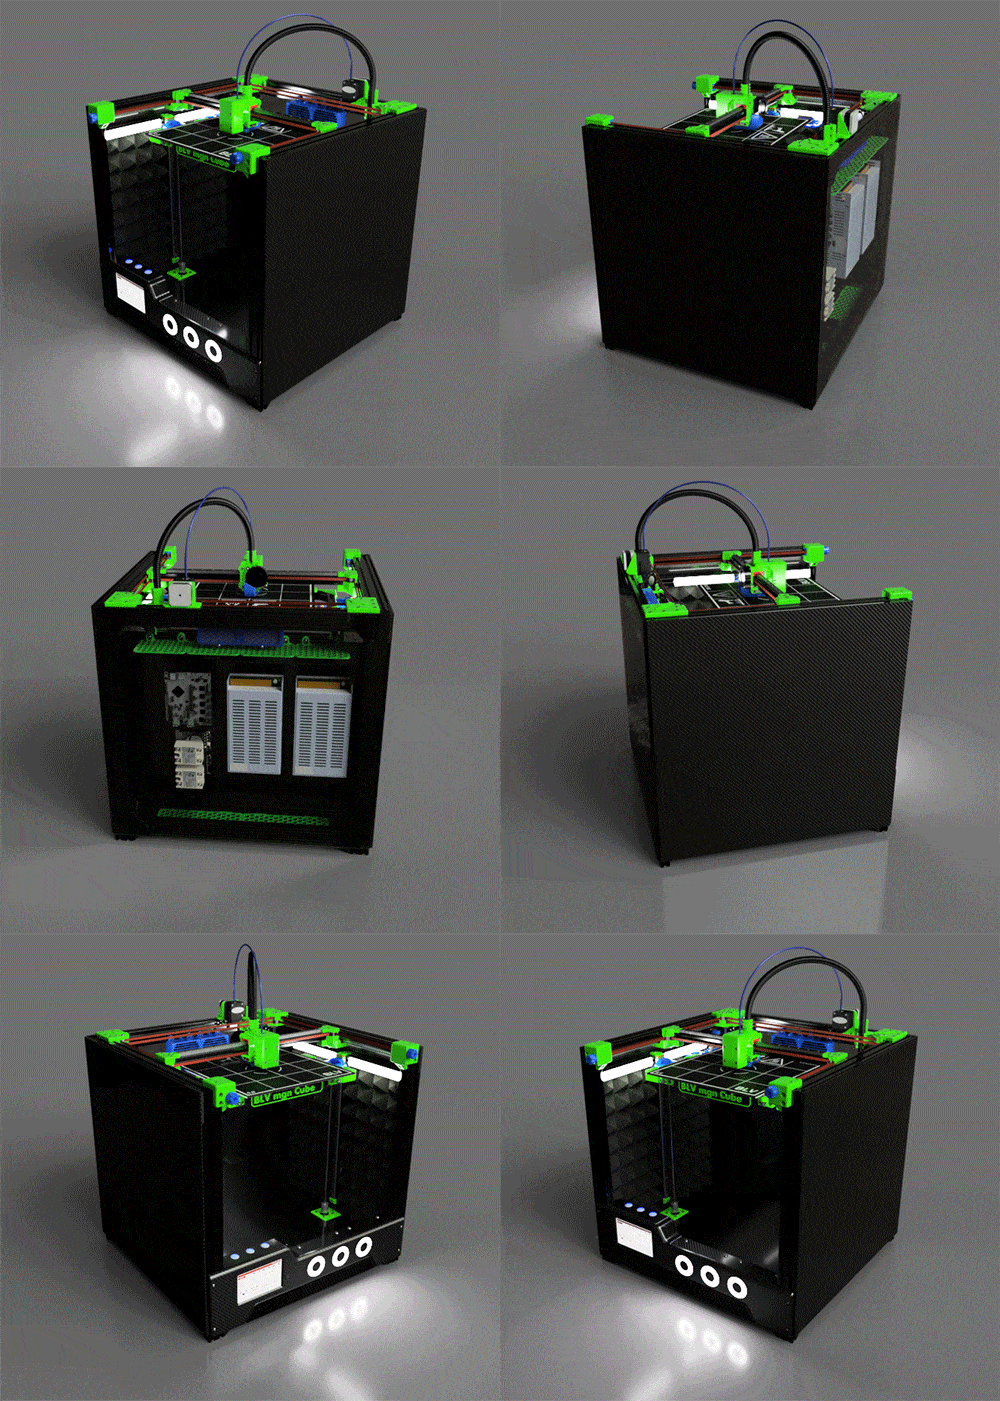
    Early in 2019 Ben Levi posted an open source 3D printer called the BLV MGN Cube. It’s like many core-xy style printers, but uses MGN linear rails instead of rods and bearings to try to get pro-level accuracy on a hobby budget.

    To take advantage of those high quality rails you need the other components to match. It calls fro Duet controller, 0.9º steppers, 20x40 extrusion, and every other best-of-class component in 3D printing today.

    And to top it off, you have to print dozens of parts on your current 3D printer just to get the thing going.

    Let’s do this

    I pulled the trigger and started buying parts for it while I was laying in a hospital bed. I probably wouldn’t have been able to do it without being mildly delirious. It’s expensive and it’s going to take a huge amount of time and effort to complete. I’m in way over my head, but I think that’s just the way I like it.

    Fast Forward Dev Journal

    It’s been about three weeks since the hospital. I’m not nearly as sick as I was and I’ve been keeping a dev journal of the printer build. At first it was just for me, but I think it might make for interesting blogging too.

    For the next few days I’m just going to play catch-up – posting pages from a couple weeks ago. But I should catch up to the present quickly. I didn’t make too much progress at first when I was still very ill. Even now I can only work on it at most an hour or so a day.

    → 11:16 PM, Nov 26
  • Stacks Dev Journal - Sprint

    Developer Beta

    At the beginning of the week I had somewhere around 15 bugs left in the list before sending out a developer beta for Stacks 4. After closing a few of the easy ones I found a few more. Sometime early in the week the list got up to 23 bugs. But thankfully most were easy. It’s Thursday night. I’ve still got all day Friday and Saturday. My goal is to finish before Saturday at dinner time.

    I just closed 2 of the larger bugs on the list, one was a minor feature addition. It took most of the day. There are still 4 bugs to go. And about 2 days. And nothing left on the list is easy anymore.

    Sprint

    I think I’ve got a good shot at finishing as long as nothing too major crops up. I just need to stay focused and nail down two bugs each day.

    But right now, sleep. Sleep is definitely what I need. Goodnight. 😴

    #dotblog #devjournal #sprint #devbeta

    *What is this: these are random snippets from my dev journal working various projects. Some of these projects are for work, some are just for fun.

    → 3:39 AM, Mar 1
  • Stacks Dev Blog -- Integration Testing a Plugin

    After writing about the success I had building a test-fixture to profile my plugins in Instruments, it struck me that profiling was only the tip of the iceberg.

    Another pain-point for the past ten years of building Stacks has been the lack of complete integration testing.

    I can do unit-testing, sure. And that’s great. As Stacks has matured I’ve leaned on unit-testing more and more. But opening a complex page and running a full export required RapidWeaver. Of course I can test against the RapidWeaver app, but it’s difficult to do controlled testing on an opaque app.

    I did write a weird command line app that force-feeds RapidWeaver a file and tells it to export. But it’s very much a hack and as soon as it was written, the private calls used to make it work were already stale and failing. Things that stop working suddenly and often tend to fall into disrepair very quickly.

    But my profiling app works great for as a stand-alone test-bench. I can finally do complete exports!

    Well… Sort of…

    Any place in the code I bump into the RapidWeaver API things break, of course. Even linking in the RapidWeaver API frameworks isn’t a fix – exporting needs the private parts of the app too.

    But years ago, probably to buffer Stacks from the vast RapidWeaver 6.0 API changes, I built an API “shim”. It’s my own interface that does the work of talking to the RapidWeaver API. My shim knows about all the little RapidWeaver API changes in each version, but presents a consistent interface to the rest of Stacks. Stacks never calls the RapidWeaver API directly. Only the shim.

    So… I just wrote a mock for the other side of my shim that imitates the basics and fakes the rest. And boom! I’m in business. Now I can do complete integration and speed testing on full scale exports. I know this may seem like a really boring detail, but I just did a literal happy dance in my office.

    Now I’m kicking myself for having not done this years ago. I guess I thought it would be a lot more work, or maybe even impossible. But a bunch of things like this shim have been in place for years – I just hadn’t ever really pieced them together in a complete test-fixture.

    → 2:12 PM, Feb 10
  • Stacks Dev Journal - Custom Toolbar Buttons

    Toolbars and dark mode

    I had hoped to get away without modifying the Stacks 3 custom toolbars and toolbar buttons too much. Their look is simple enough not to need too much modification, or so I thought. Stacks 4 will add a smaller variant of the toolbar for text editing features – that bit seemed to work great in dark mode too.

    But dark mode changed other things. And not everything works perfectly. In Stacks 3 the info pane at the bottom of the Library is “vibrant” – it shows colors from underneath the pane in an etched glass sort of way. In Stacks 3.5 dark mode is supported, but when switching between modes this little pane stays stubbornly the same.

    It’s due to a compatibility shim I added to allow me to support OS versions before vibrancy was introduced. Stacks 4 won’t need this shim, so I removed it and that fixed the problem. But the shim was also being used in all the toolbars.

    Oh no.

    The info pane was connected to the toolbars

    I then spent a couple days fixing the affected toolbars and getting their vibrancy materials right in dark mode too. But this, of course, affected the all the custom toolbar buttons as well.

    Oh no.

    Customizing NSButtons is not as trivial as you’d hope. It’s certainly nothing like iOS, that’s for sure. In an old-school Cocoa sort of way, each NSButton is paired with a corresponding NSButtonCell. The cell does the drawing for each of the oh-em-gee-there-are-so-many-states in the NSButton. And now, with dark mode, there are double the number of states. Worse, dark mode toolbar buttons have quite a few differences to their light mode counterpart.

    • Light mode buttons get darker when pushed.
    • Dark mode buttons get lighter.
    • On-state and off-state work slightly differently.
    • Light mode toolbar buttons have a flat white background, a noticeable border-shadow (only ½ pixel wide on retina) and black foreground color.
    • Dark mode toolbar buttons have a gradient gray background, no visible border-shadow and off-white foreground color.

    Oh no.

    I nearly punted. It’s a lot of little detailed quirky things. A whole bunch of custom gradients – that are of course slightly different in dark mode. If I deleted my custom buttons and went with a vanilla NSButton I could get rid of a lot of code and be days closer to final release. But having a few colored buttons has been a staple part of the look of Stacks since version 1.0 – I really like those colors. They help identify Stacks amidst a complex and ever changing RapidWeaver UI.

    Oh yes.

    So I did the work. It took about four days if I include the vibrancy bit and the toolbars. I built new gradients for dark mode that are darker and more saturated. I added the thin light gray border-shadow in light mode. And a dark-mode-only interior bevel. I was already using NSColor.labelColor for the foreground drawing. So that’s one tiny little bit I got for free. The end result isn’t a direct copy of any specific NSButton UI and that’s just fine. I wanted them to be a tiny bit unique.

    And here’s the result. The gif is showing the three new colored buttons that also happen to be one of the large feature additions in Stacks 4. The posterized colors in the gif don’t do the gradients justice, but you get the idea. I imagine I’ll keep tweaking these right up to the release. So if I missed any little details let me know.

    Toolbar Buttons

    #dotblog #devjournal #custom-ui

    *What is this: these are random snippets from my dev journal working various projects. Some of these projects are for work, some are just for fun.

    → 1:28 PM, Feb 6
  • Stacks Dev Journal - Xcode, Instruments, and Mojave

    Securiteh!!!

    Mojave includes many more system level protections to keep out malware. But with this security comes some annoying side effects. One that hit me recently is that I can’t attach Instruments to some apps. This has made plugin development difficult, particularly because RapidWeaver is one of those apps.

    Plugins are weird

    To debug and profile Stacks, I launch RapidWeaver, with Stacks installed of course, and attach the debugger or an Instruments tool (is that called an instrument? Ha! That’s very Stacks-like verbiage). The tool won’t see much useful info from the app if it has been symbol-stripped, but my plugin code does have symbols, so lldb and Instruments work just like you’d expect. I’ve been using this system since 2005 when I started writing plugins for RapidWeaver.

    All this changed in Mojave. Now, when running some Instruments like Allocations, I get a very unhelpful error message (see image below). Not every instrument is broken however, many work fine.

    What works and what doesn’t

    I’ll be honest, I haven’t researched this problem very far. Security “features” seem far more irritating than interesting, which tends to keep me ignorant about them. I expect there’s a great WWDC talk it somewhere. I really hope I never have to watch it.

    What I do know is that some released apps don’t seem to work. More importantly, RapidWeaver doesn’t. But apps I build myself work just fine.

    I was slow coming to this realization. This summer when I first bumped into this problem in the Mojave beta, I assumed it was just a beta quirk. When public release didn’t resolve the issue, I then assumed it was a bug I introduced into the Xcode project config. But after an accidentally ⌘-I in my test fixture I was pleasantly surprised to find Instruments working perfectly.

    Side project pays off

    As a side project, I’ve been slowly building up my little test fixture to be more capable. This week I merged the side project branch after I hit a pretty significant milestone: the test fixture can now display the Stacks user interface complete with library, 3rd party stacks, and an info-sidebar.

    I still can’t do anything real, like open a project file or even do a real export. I’m not sure I’ll ever need to take it that far just to exercise my code.

    If Apple locked plugins out of Instruments today, then lldb could be on the chopping block. Without a debugger development of a tool like Stacks would be impossible. I sleep a little easier knowing that if lldb is locked out, I can rely on my little test app to help me out even more.

    Halp!

    If anyone knows more about these errors, especially if you know how to fix them, please let me know. Until then I’ll just keep adding bits to my side project every weekend.

    Instruments Error

    #dotblog #devjournal

    *What is this: these are random snippets from my dev journal working various projects. Some of these projects are for work, some are just for fun.

    → 2:24 PM, Feb 4
  • RSS
  • JSON Feed
  • Micro.blog